You sit down to study, open your laptop, and twenty minutes later your neck is tight, your lower back aches, and your brain feels foggy. You have the time, you have the notes, but your body is quietly pulling you away from the page.
That is where posture and focus connect. Research in 2025 shows that the way you sit affects pain, breathing, blood flow, and energy. Slouching makes breathing shallow, reduces oxygen to your brain, and tires your muscles. Good support and simple movement breaks do the opposite, and help you think more clearly for longer.
The good news is that you do not need a fancy office chair or a big desk. Small tweaks with what you already have, even in a bedroom, library, dorm, or shared kitchen table, can make a real difference.
This guide walks through practical, step‑by‑step changes you can try today, so you can study longer without feeling broken at the end.
Key Takeaways: Easy Ergonomic Wins for Longer, Sharper Study
- Good posture is about comfort and focus, not looking perfect.
- Tiny changes to your chair, desk, and screen can cut pain and boost energy.
- Core rules: feet flat, back supported, screen close to eye level.
- Movement breaks and simple stretches matter as much as how you sit.
- You can improve posture in small or shared spaces with books, pillows, and boxes.
- A tidy, well‑lit space makes it easier for your brain to stay on task.
- Short, regular habits beat one big posture fix you forget tomorrow.
Table of Contents
- Key Takeaways: Easy Ergonomic Wins for Longer, Sharper Study
- How Good Posture Boosts Focus, Energy, and Study Stamina
- Fixing Common Study Posture Mistakes in Just a Few Minutes
- Building a Student‑Friendly Ergonomic Study Setup in Any Space
- Micro‑Movements, Breaks, and Stretches to Stay Focused for Longer
- Putting It All Together: A Sample Ergonomic Study Routine for Students
- Frequently Asked Questions About Posture, Ergonomics, and Study Focus
- Conclusion
How Good Posture Boosts Focus, Energy, and Study Stamina
When you sit hunched over, your body is working hard just to hold you up. Neck and back muscles strain, breathing gets shallow, and your brain gets less oxygen. No wonder reading a chapter feels like climbing a hill.
Straighten up a little, and the picture changes. Your chest opens, lungs work better, and blood flow to your brain improves. Recent studies show that students with better posture can stay focused longer and perform better on tasks that need clear thinking.
From Slouching to Sharper Thinking: What Happens Inside Your Body
Picture two versions of the same revision session.
Version one: you are curled over your laptop, shoulders rounded, chin pushed forwards. After half an hour, your neck throbs, eyes sting, and you start rubbing your shoulders instead of reading. Your brain feels slow, even though you slept well.
Version two: you sit back in the chair, back supported, screen raised on a few textbooks. Your neck stays in line with your spine, breathing feels easier, and your shoulders relax. After the same half hour, you feel tired from thinking, not from fighting your own body.
That difference comes from simple cause and effect:
- Slouching tightens muscles in your neck, shoulders, and lower back.
- Tight muscles cause pain and headaches.
- Pain and stiffness reduce concentration and make your brain feel “foggy”.
- Shallow breathing means less oxygen reaches your brain, so energy drops.
Better posture flips this:
- Upright sitting opens your chest so you breathe more deeply.
- Deeper breathing sends more oxygen to your brain.
- Relaxed muscles waste less energy, so you stay sharper for longer.
Pain, Fatigue, and Distraction: Why Your Body Keeps Breaking Your Focus
It is hard to focus on a paragraph if your lower back is screaming. Discomfort steals attention in small bursts. You shift, stretch, crack your neck, and lose your place in the notes again and again.
Certain habits are common:
- Forward head (tech neck) often leads to neck ache and headaches.
- Rounded shoulders can cause burning pain between your shoulder blades.
- Twisted sitting or crossing legs tightly can trigger lower back and hip pain.
Fixing your setup for five minutes before you start can save you from twenty minutes of fidgeting later. It is one of the simplest ways to support any other study technique, from active recall to proven study techniques for test success.
Confidence and Mood: How Sitting Tall Can Change How You Study
Your posture does not just change your muscles. It also changes how you feel.
Sitting up tall, with your feet grounded and shoulders relaxed, sends a quiet message to your brain: “I am ready for this.” Studies link upright posture with better mood and more confidence, which makes hard tasks feel more doable.
Imagine a cluttered desk, dim lighting, and you hunched over your notes. It is easy to feel overwhelmed. Now picture a simple, clear surface, laptop raised, chair pulled in, and you sitting tall with a deep breath. Same work, very different feeling.
That shift in mood often makes the difference between starting an essay and putting it off again.
Fixing Common Study Posture Mistakes in Just a Few Minutes
You do not have to overhaul your whole room. Start by spotting a few common mistakes and using quick fixes you can do in under five minutes.
Slouching and Hunched Shoulders: How to Sit Without Feeling Stiff
Slouching often feels “relaxed”, but it loads your spine. Your lower back rounds, your shoulders fold in, and your head drifts forwards.
Try this simple reset:
- Sit right back into the chair so your hips touch the backrest.
- Place both feet flat on the floor, hip‑width apart.
- Roll your shoulders up towards your ears, then gently down and back.
- Imagine a string lifting the crown of your head towards the ceiling.
If the chair is hard or flat, tuck a small cushion or rolled towel into the curve of your lower back. That little bit of support reduces slumping, especially during long reading sessions.
Forward Head and Tech Neck: Bringing Your Screen and Notes Up to You
Bending your neck to look down at a low laptop or phone forces your neck muscles to hold a heavy load for hours. That often leads to tightness, headaches, and even jaw pain.
Your goal is simple: bring the work up to your eyes.
- Stack sturdy textbooks or a box under your laptop to raise the screen.
- If you have a laptop stand, use it and keep the top of the screen near eye level.
- Tilt the screen so you can see clearly without leaning forwards.
- Prop textbooks on a folder, stand, or even another book, rather than flat on the desk.
Quick alignment check: ears over shoulders, chin gently tucked, eyes looking straight ahead, not sharply down.
Crossed Legs, Twisted Sitting, and Perching on the Edge of the Chair
Crossing your legs or leaning to one side might feel casual, but over time it twists your hips and spine. That makes it hard to sit for long without aches.
Posture cues to try:
- Slide your hips back in the chair so your back can rest on the backrest.
- Place both feet flat on the floor, or on a stack of books if they do not reach.
- Aim for knees at about 90 degrees, roughly level with your hips.
If the desk is too high, raise yourself with a cushion. If it is too low, lift your work with books instead. The idea is to fit the furniture to you, not the other way round.
Overloaded Backpacks and Carrying Books the Hard Way
Dragging a heavy bag on one shoulder tightens muscles on that side of your neck and back. Later, when you sit to study, you already feel tense.
Easy wins:
- Use both backpack straps and tighten them so the bag sits high on your back.
- Carry only what you actually need for that day or library trip.
- If you often lug big loads, store some books in your locker, room, or car.
Arriving at your desk with a relaxed back means you are more ready to focus, not just recover.
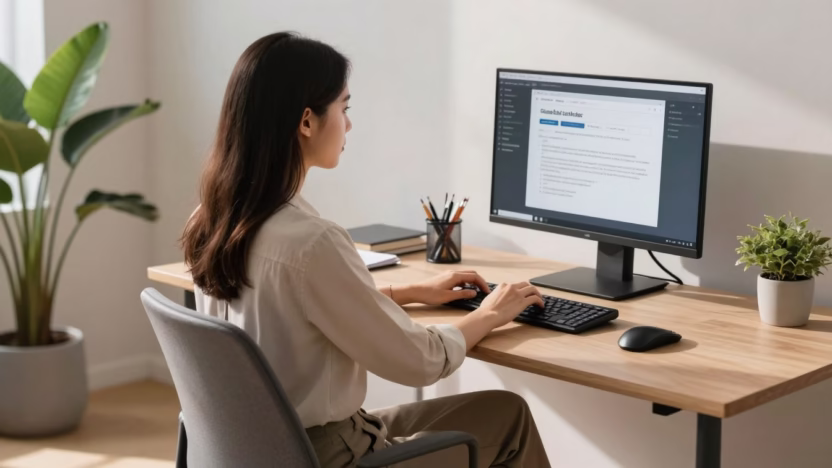
Building a Student‑Friendly Ergonomic Study Setup in Any Space
You might be working at a tiny flat‑pack desk, a wobbly kitchen table, or a library carrel that thousands of students have used before you. That is fine. You can still follow core ergonomic principles: neutral joints, screen near eye level, back support, stable feet, and decent lighting.
Chair and Desk Basics: Feet Flat, Elbows at 90 Degrees, Back Supported
Start with how you sit:
- Feet flat on the floor, or on a stack of books or a box.
- Knees roughly level with hips, not pulled up or dropping away.
- Elbows bent at about 90 degrees, with forearms resting lightly on the desk.
Small changes help:
- If the chair is too low, sit on a folded blanket or cushion.
- If it is too high, use a footrest made from books or a sturdy box.
- Move closer to the desk so you are not reaching forwards all the time.
You should feel stable, with your weight on your sitting bones, not hanging off the edge of the seat.
Laptop and Screen Position: Protecting Your Neck and Eyes
Screens that are too low or too close are a big source of strain.
Aim for:
- Screen at or just below eye level.
- About an arm’s length between your eyes and the screen.
Practical tweaks:
- Stack textbooks under your laptop to raise it.
- If you own a separate keyboard and mouse, use them so your hands can stay low while the screen stays high.
- Adjust the screen angle to cut glare from windows or overhead lights.
For phones and tablets, avoid holding them low in your lap for long. Prop them up on a stand, mug, or stack of books, or bring the device to eye level when you read.
If you like using music to keep you in the zone, a good setup pairs well with classical music playlists for productivity.
Keyboard, Mouse, and Writing Space: Keeping Wrists and Shoulders Happy
Tight wrists and sore shoulders are often a sign that your keyboard and mouse are too far away or too high.
Simple rules:
- Keep the keyboard and mouse close, so your elbows can rest by your sides.
- Let your wrists stay straight and relaxed, not bent up or down.
- Use a folded towel as a soft wrist rest if the desk edge cuts into your arms.
Place your main notebook or textbook directly in front of you when you write. If you always twist to one side to see a book, swap sides regularly or move the book to the centre.
Lighting and Clutter: Setting Up a Calm, Focused Study Zone
Poor lighting makes your eyes work harder and can cause headaches. A messy desk adds mental noise.
Aim for:
- A desk lamp pointing at the page or keyboard, not straight into your eyes.
- A mix of natural and artificial light where possible, without harsh glare on screens.
Quick three‑minute tidy before you start:
- Throw away any rubbish.
- Stack books and notes into neat piles.
- Leave only what you need for this session on the desk.
A clearer space often means a clearer mind. If you want to go deeper with this idea, have a look at how a minimalist mindset for student productivity can support your focus.
Micro‑Movements, Breaks, and Stretches to Stay Focused for Longer
Ergonomics is not just about the chair. Staying in any position for too long is tiring, even if that position is “perfect”. Small, regular movements keep blood flowing and stop stiffness building up.
Think of movement as fuel for your brain, not a break from “real work”.
The 20‑8‑2 Rule: A Simple Formula to Protect Your Body and Brain
A handy pattern for screen work is the 20‑8‑2 rule in each 30‑minute block:
- About 20 minutes sitting and working with good posture.
- Around 8 minutes standing or stretching near your desk.
- Roughly 2 minutes of extra movement, like walking to fill your bottle or climbing stairs.
You do not have to be exact. The idea is to stop yourself sitting without a break for an hour straight. Use a simple phone timer, or line your breaks up with natural pauses, like finishing a practice question set.
Quick Desk Stretches for Your Neck, Shoulders, Back, and Wrists
You do not need gym gear. Try a few of these during your short breaks:
- Neck turns: Slowly turn your head to look over one shoulder, hold for a few breaths, then swap sides.
- Chin tucks: Gently draw your chin back, as if making a double chin, hold for three seconds, then relax.
- Shoulder rolls: Roll both shoulders forwards in a circle a few times, then backwards.
- Chest stretch: Clasp your hands behind your back or hold the back of your chair, gently open your chest and breathe.
- Seated twist: Sit tall, place one hand on the opposite knee, and gently twist your upper body.
- Wrist circles: Make loose fists and circle your wrists in both directions.
Move slowly, stay within a comfortable range, and stop if anything hurts sharply.
Tiny Daily Habits That Slowly Improve Your Posture
Posture improves with repetition, not perfection. Small habits help:
- Set an hourly reminder to check in on “feet flat, back supported, shoulders relaxed”.
- Stick a note on your laptop that says “sit tall” or “uncurl your shoulders”.
- Drink water in every break to help your body and brain.
- Swap five minutes of bedtime scrolling for gentle stretches on the floor.
- Stand tall when you wait in queues or for the bus, instead of slumping on one hip.
If focus is a struggle for you, especially with ADHD, pairing these habits with ADHD‑friendly study strategies can make long study days feel far more doable.
Putting It All Together: A Sample Ergonomic Study Routine for Students
It helps to see how these ideas fit into real time. Here is a simple way to structure an evening revision block.
A 60 to 90 Minute Revision Block with Built‑In Posture Checkpoints
Try this pattern:
- Minutes 0–5: Set up. Adjust your chair and screen, place feet flat, add a cushion or towel if needed, clear the desk, and check lighting.
- Minutes 5–25: Focused work. Sit back into the chair, shoulders relaxed. At minute 15, do a quick scan: ears over shoulders, eyes level with the top of the screen.
- Minutes 25–28: Short stretch break. Stand up, roll shoulders, do a neck turn each side, and a chest stretch.
- Minutes 28–48: Second work block. Start by resetting posture again, then dive into the next task or use a method like spaced repetition learning to review flashcards.
- Minutes 48–55: Move. Walk to get water, use the loo, or go up and down stairs.
If you want a 90‑minute block, add another 20‑minute work and short stretch segment.
This format works for GCSE, A‑level, and university students, and you can mix in other focus tools, such as using coffee to maximise study focus.
Adapting These Tips for Libraries, Dorms, and Shared Spaces
Real life study spots are often far from perfect, but small tweaks still help.
Ideas:
- Use a folded jacket or hoodie as a cushion or lumbar support.
- In the library, stack books under your laptop to raise the screen.
- If the lighting is harsh, move to a seat with softer light, or turn your screen brightness down and adjust contrast.
- Take “micro breaks” by standing beside your chair for a minute or two, stretching quietly without leaving your spot.
- In shared houses, claim a corner of the table as your regular setup, and keep a small kit (cushion, headphones, charger) ready.
You are aiming for “better than before”, not perfect ergonomics.
Frequently Asked Questions About Posture, Ergonomics, and Study Focus
Do I really need an expensive ergonomic chair to have good posture?
No. A basic chair can work well if you add support where you need it. Sit back, use a small cushion or rolled towel in your lower back, and adjust your seat height with a cushion or folded blanket. The way you use the chair matters more than the price tag.
How close is too close to the screen when I study?
A good guide is about an arm’s length from your eyes to the screen. If your eyes feel strained or you find yourself leaning forwards, push the screen back a little and increase text size instead of moving your face closer.
Is it bad to study in bed if I have no desk?
Studying in bed is not ideal, but sometimes it is the only option. If you must, sit upright against pillows, place your laptop on a firm surface like a tray or stack of books, and keep sessions short. Try to move to a different spot for long essay writing or heavy revision.
How long can I safely sit at my desk without a break?
Research suggests that long, unbroken sitting leads to more pain and fatigue. Aim for some movement at least every 30 minutes, even if it is just standing, stretching, or walking across the room for a couple of minutes.
What if I already have back or neck pain from studying?
First, adjust your setup and add gentle movement breaks. Many students feel better with better support and regular stretching. If pain is strong, sharp, or does not improve, speak to a doctor or physiotherapist. Good posture helps, but it is not a replacement for medical advice.
Can standing desks help students focus, or is sitting fine?
Both sitting and standing can work well if you use good posture and move often. A standing desk can reduce sitting time, but standing still for hours also causes fatigue. If you have a height‑adjustable desk, switch between sitting and standing across your study blocks.
Is it okay to listen to music while I study if I am focusing on posture too?
Yes. Posture and music are separate choices. Many students find calm instrumental tracks helpful for focus, and good ergonomics simply support your body while you listen and work.
Conclusion
Good posture is not about sitting like a statue. It is about small, realistic tweaks that reduce pain and free up energy so your brain can focus. Simple habits like feet flat, back supported, screen at eye level, and regular movement breaks can transform how long and how comfortably you can study.
You do not need a perfect study setup, just steady improvements with what you already have. For your next session, pick one or two changes, such as raising your screen, using a cushion for your lower back, or trying the 20‑8‑2 pattern.
Taking care of your body is part of being a successful student, not a distraction from your work. When your study space supports you, it becomes much easier to sit down, stay focused, and actually finish what you started.